Today we started getting down to business and building our computer. First here are the final specs for our build:
- Processor: Intel Core i5-2500K Sandy Bridge 3.3GHz
- Motherboard: ASRock Z68 EXTREME4 GEN3 LGA 1155
- RAM: G.SKILL Ripjaws Series 8GB (2 x 4GB) 240-Pin DDR3 SDRAM DDR3 1600 (PC3 12800)
- Graphics Card: EVGA SuperClocked 012-P3-1573-AR GeForce GTX 570 HD w/Display-Port (Fermi) 1280MB
- Hard Drive: Western Digital Caviar Blue WD5000AAKX 500GB 7200 RPM 16MB Cache SATA 6.0Gb/s 3.5"
- SSD: Crucial M4 CT064M4SSD2CCA 2.5" 64GB SATA III MLC
- Case: COOLER MASTER HAF 922 RC-922M-KKN1-GP Black Steel + Plastic and Mesh Bezel ATX
- CPU Cooler: COOLER MASTER Hyper 212 Plus RR-B10-212P-G1 120mm
- Power Supply: SeaSonic X750 Gold 750W ATX12V V2.3/EPS 12V V2.91 SLI Ready 80 PLUS GOLD Certified Modular Active PFC
- Keyboard and Mouse: Logitech Wireless Combo MK260 920-002950 Black 8 Function Keys USB RF Wireless
- Monitor: ASUS VE258Q Black 25" 2ms HDMI LED Backlight Widescreen LCD Monitor w/Display Port & Speakers 250 cd/m2 50,000,000:1 ASCR
We started by unboxing the case. We chose the HAF 922 because of its 2 massive 200mm fans (one in the front and one on top) which will give us the airflow needed for overclocking.
 |
| Unopened 922 HAF |
The first thing we noticed when unboxing the case was that it is massive (especially for being advertized as a mid-tower case)!!! The side panels are easily removed by four thumb screws (two on each side on the back of the case) revealing the spacious interior.
 |
| Unboxing the case |
 |
| The 922 HAF |
 |
| Everything the case came with |
The case came with two bags of screws, two mounting brackets for a 3.5 in drive, a bunch of zip-ties, and a POST speaker to be attached to the motherboard.
We decided early on that we would first do an out of case build to make sure that all of the major components worked. We moved the case to under the table so it would be out of the way, yet close enough so we could stay grounded using an anti-static wrist strap.
Once the case was out of the way we opened the motherboard. We chose the ASRock Z68 EXTREME4 GEN3 for a number of reasons. First of all, it supports the most recent Intel CPU socket, LGA 1155, which allows us to use the new second-generation Intel sandy bridge chips. Also, it uses the new Intel Z68 chipset, which is faster in coordinating system hardware, and allows us to use Intel Smart Response Technology. It comes with a USB 3.0 front panel bracket which can hold an SSD. And it has PCI express 3.0 support which allows for the use of next gen. video cards.
 |
| The Mobo |
 |
| Damn straight!!! |
The motherboard itself came with 4 SATA cables, an IO tray, 2 molex to SATA power connectors, a USB 3.0 SSD mounting bracket, an SLI bridge, an audio cable, and a floppy drive connector.
 |
| Unboxed Mobo |
The motherboard itself was packaged in a foam ring which turned out to be very useful during our initial out of case build because it kept the bottom of the board elevated so there was no chance anything could get scratched.
 |
| Unboxed Mobo (check out the foam!!) |
Next we opened up the RAM. G.SKILL Ripjaws Series 8GB was chosen because it was relatively cheep and many people seemed to be having success using it.
 |
| RAM in box |
The RAM was the first thing we installed to our motherboard because we wanted it to be below the CPU fan.
 |
| So pretty!! |
The processor we chose was the Intel Core i5-2500K, which we felt gave us the best performance for our money. As of now for our gaming build there is nothing on the market that is justifiably better by price. The only time you would need an i7 is if you are doing something crazy like heavy movie editing.
 |
| i5-2500K |
 |
| The star of tonight show!! |
Unboxing the i5 was relatively unexciting. It came with the processor, and a stock cooler which we will not be using.
 |
| Useless... |
Installing the processor was easy, but insanely nerve racking! We just removed the cover on the motherboard, dropped in the i5 (ZERO INSERTION FORCE!!!!) and closed the load plate over the chip.
 |
| Look at all the little pins! |
 |
| ...and we can breath again |
Once the processor was in its socket, it was time to open our aftermarket CPU cooler. We chose the COOLER MASTER Hyper 212 Plus because it was cheep and had great ratings on newegg.com.
 |
| CPU cooler |
The COOLER MASTER Hyper 212 Plus came with a 120mm fan, a direct heat pipe contact heat spreader, a mounting bracket, some screws, and thermal compound.
 |
| Oh so cool... |
Before we could mount the bracket that the heat spreader would sit on we had to cut away some of the foam to be able to access the screw holes in the motherboard. Mounting the CPU cooler was relatively difficult because one person had to hold the bracket to the back of the motherboard while another person held up the motherboard and held the screws in place because the bracket would only slide on when the screws were aligned just right. Once everything was in place, we then had to screw on the nuts from the back, fighting the gravity holding the screws in place. It took us about 30 minutes and a lot of frustration just to get the mounting bracket on. We would recommend trying this next time with three people with one person holding the motherboard, one person holding the screws and bracket, and one person screwing on the nuts.
 |
| Finally got the bracket on! |
 |
| From the other side |
Once the bracket was on it was time to apply the thermal paste! We actually bought some Arctic Silver 5 thermal paste because we did not know that the CPU cooler would come with its own. There are several methods to apply thermal paste, but we decided the easiest and most effective would be to put a pea size amount onto the CPU and then just attach the heat spreader. This evenly spreads the paste onto the top of the CPU and insures that there are no air pockets (the reason we use thermal paste in the first place!)
 |
| Mmm peas!!! |
 |
| Attaching the heat spreader |
Once the heat spreader was on, we attached the fan, which just snapped on and fit nicely over the RAM as expected!
 |
| The fan just fits! |
Once the fan was on it was time for the graphics card! Originally we were going to get the Nvidia GTX 560Ti because that is said to be the best graphics card for the money, but due to Black Friday deals we were able to get the EVGA SuperClocked 012-P3-1573-AR GeForce GTX 570 HD for only $50 more, which was a no-brainer in our minds!
 |
| GTX 570 HD box |
In hind sight we should have gotten the non-HD version because the HD version blows hot air into the case while the non-HD version blows it straight out the back, allowing for much better air flow and decreasing the temperatures in the case. We were hoping the packaging would be foam because that is what we have seen on other people's builds, but EVGA got lazy and only gave us plastic.
 |
| No foam :( |
The GTX 570 did come with 2 molex to PCIe cables, a VGA to DVI adapter, a drivers CD, and a poster!
 |
| Thar she blows!! |
Attaching the graphics card to the motherboard was not that difficult. The snag we hit was the edge of the back plate was hitting the foam and box the board was resting on. We cut a notch out of the foam and let the metal back plate hang of the edge of the box and the card snapped right into place.
 |
| One step closer to pwning n00bs! |
With the graphics card in place it was time to open our power supply. We chose the SeaSonic X750 Gold 750W power supply because SeaSonic is a very good brand, 750W is enough power to support our components and overclocking, its rated 80 plus gold meaning it is very efficient, and it is modular allowing us to use only the power cables we need.
 |
| Power supply unit box |
Opening the PSU was an experience to say the least. The unit itself was wrapped in a very nice black felt bag. Also inside the box was what I can only describe as a cable utility belt bag which housed all of the modular power cables.
 |
| Ohhhh!!! |
 |
| Oh you fancy huh? |
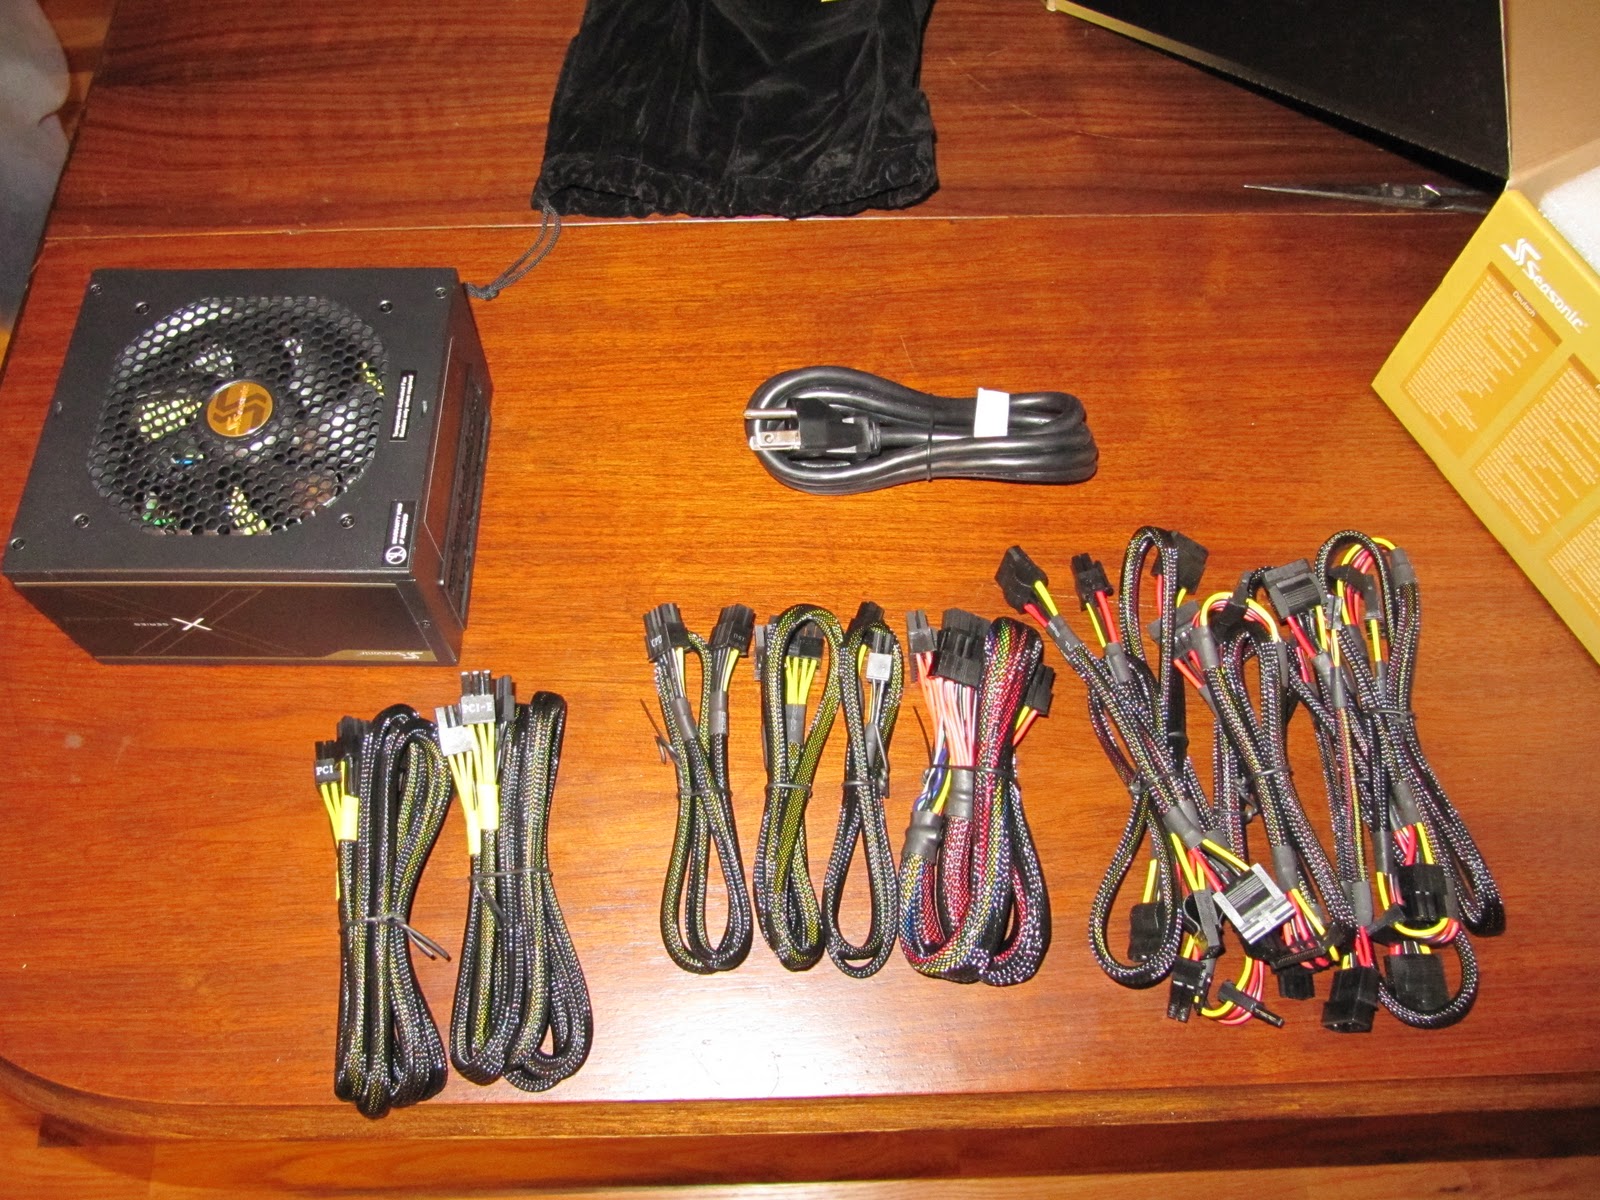
In the box was the power unit, a bunch of modular power cables, and the main power cord for the unit. The bag that the cables in was very nice because we did not use them all and could easily store them for later in case we wanted to add more components.
 |
| Lots of cables! |
Powering everything was very easy and soon we were ready to get the monitor set up. The ASUS VE258Q Black 25" was chosen because it was big and there were many good reviews online.
 |
| ASUS VE258 box |
Putting together the monitor was actually harder than we expected because the base required more force to snap in than we were use to when dealing with more delicate components.
 |
| Hay there gorgeous! |
Then it was time for the moment of truth, the first power up!!! We plugged everything in, made sure the power supply and monitor were on, and hit the convenient power button on the motherboard and...
 |
| Moment of truth... |
It worked!!!!!!
 |
| YAY!!!!!!!!!!! |
There was a quick moment of doubt because there was no POST beep, but the monitor revealed that our labors (of love) had payed off! We attribute the lack of POST beep to a faulty POST speaker. We then took a well deserved, celebratory break and started scheming about getting it into the case...